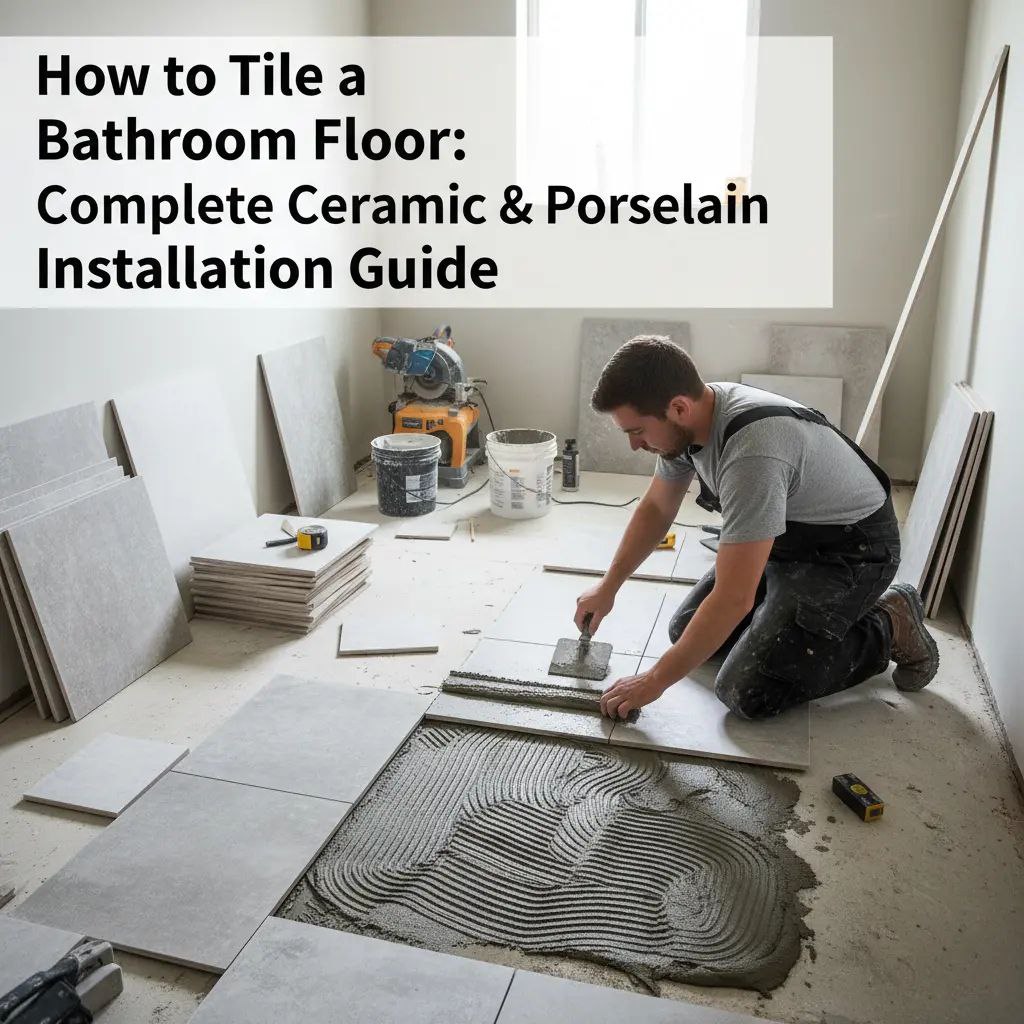
Tile is one of the most popular materials for bathroom floors. It can be used to create both aesthetic and moisture-resistant coatings, which are important in spaces like bathrooms. This is the reason why so many people choose tile to create a safe and beautiful space.
In this article, we will discuss how to tile the bathroom floor correctly using ceramic or porcelain tiles. Let’s create the incredible coating that will become an integral part of your interior.
Why Tile Is the Best Choice for Bathroom Floors
Talking about the floor in the bathroom, it’s worth saying that you will never find a better solution than tile. Most people choose it for flooring because of the list of benefits:
- Perfect water resistance – one of the main advantages of tiles. This material is ideal for wet environments because it is non-porous and doesn’t warp or swell in the presence of moisture.
- Durable surface coating – tile allows you to create a wear-resistant floor that will last in your bathroom for many years. Such a tendency persists even during the heavy exploitation.
- Maintenance and hygiene aspect – this material is easy to clean with water and mild detergent. It doesn’t retain odors, helping prevent bacteria and dust mites from forming.
- No more slipping – matte-finish tiles are absolutely slip-resistant, helping prevent accidents in your bathroom. It is an important advantage considering the humidity level in this wet area.
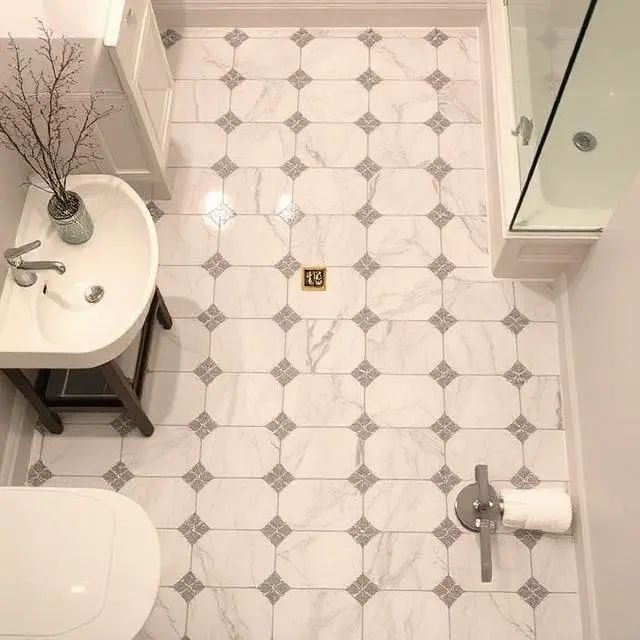
- Unforgettable design – tile is available in different colors, sizes, and styles. So, you can make whatever you want, create a personal texture, or choose wood, marble, or stone styling.
Given the benefits above, tile is the best choice for bathroom floors, allowing the creation of a customized design and a safe surface.
Benefits of Ceramic Tile
Ceramic tile is often used to create coatings with a lifespan of more than 50 years. Such popularity is explained by the number of advantages:
- durability;
- hygiene and low-maintenance solution;
- can be used both for the wall and the floor;
- high level of water resistance;
- no scratches and stains on the surface;
- fire safety;
- eco-friendly materials;
- ideal for high-traffic areas:
- cost-effective choice;
- can be used for indoor or outdoor space.
As we can see, ceramic tiles are an excellent material for a wide range of applications and designs.
Benefits of Porcelain Tile
Porcelain tile is another material often used by homeowners, tile masters, and designers. This type of coating has its benefits:
- longevity and durability;
- moisture resistance (absorption is less than 0.5%);
- easy maintenance;
- hygienic and fireproof material;
- versatile in design;
- often mimicking natural wood or stone.
Porcelain material can be used for areas with constant surface operation. At the same time, it retains its appearance.
Ceramic vs Porcelain: What’s the Difference?
If you want to cover your bathroom floor, you are likely wondering which is better: porcelain or ceramic tile. To choose the most suitable variant for your space, consider the load level and your personal budget. Everything depends on your project.
The thing is, porcelain tile is denser and more durable than ceramic tile. Its structure is less porous. That’s why porcelain tiles are often used for high-traffic floors. One more point is that porcelain tile has a lower level of moisture absorption – less than 0.5%, which makes it the best variant for bathrooms, pool areas, and others. Of course, the price is higher than that of ceramic tile.
Ceramic tiles are a budget-friendly, water-resistant material, but they are softer and easier to cut. When choosing tile type, consider the humidity level, future coating use, and your budget.
Tools and Materials You’ll Need
Before tiling a bathroom floor, prepare the necessary materials and tools. You should do it before you start laying tiles.
The list of tools:
- tile cutter or wet saw;
- special trowel;
- laser level;
- tile nipper;
- permanent marker;
- spacers for tile;
- bucket;
- sponge;
- cardboard spacer.
Necessary materials:
- porcelain tile or ceramic one;
- sealer;
- rubber grout;
- 3/4 -inch tongue-and-groove plywood (if it is needed);
- leveling compound;
- membrane to uncouple the tiles;
- thinset mortar;
- grout;
- grout sealer and remover.
This list can be expanded according to a specific project.
How to Remove Old Bathroom Floor Tile
Before starting the process of coating the bathroom floor, you need to remove the old tiles and prepare the surface. Let’s talk more about how to make it correctly.
Preparing the Room
Don’t hurry up to delete old tiles. Firstly, you need to prepare the room. Take care of cleaning all the furniture, using sealant on doorways, removing baseboards, and turning off all utilities. One more tip is to close vents to prevent the dust from spreading.
Use protective clothes, gloves, and glasses to keep your body healthy and unhurt. Don’t neglect this advice, because tile removal is a dangerous process that can harm your health and cause injuries. Follow these instructions to prepare the bathroom space.
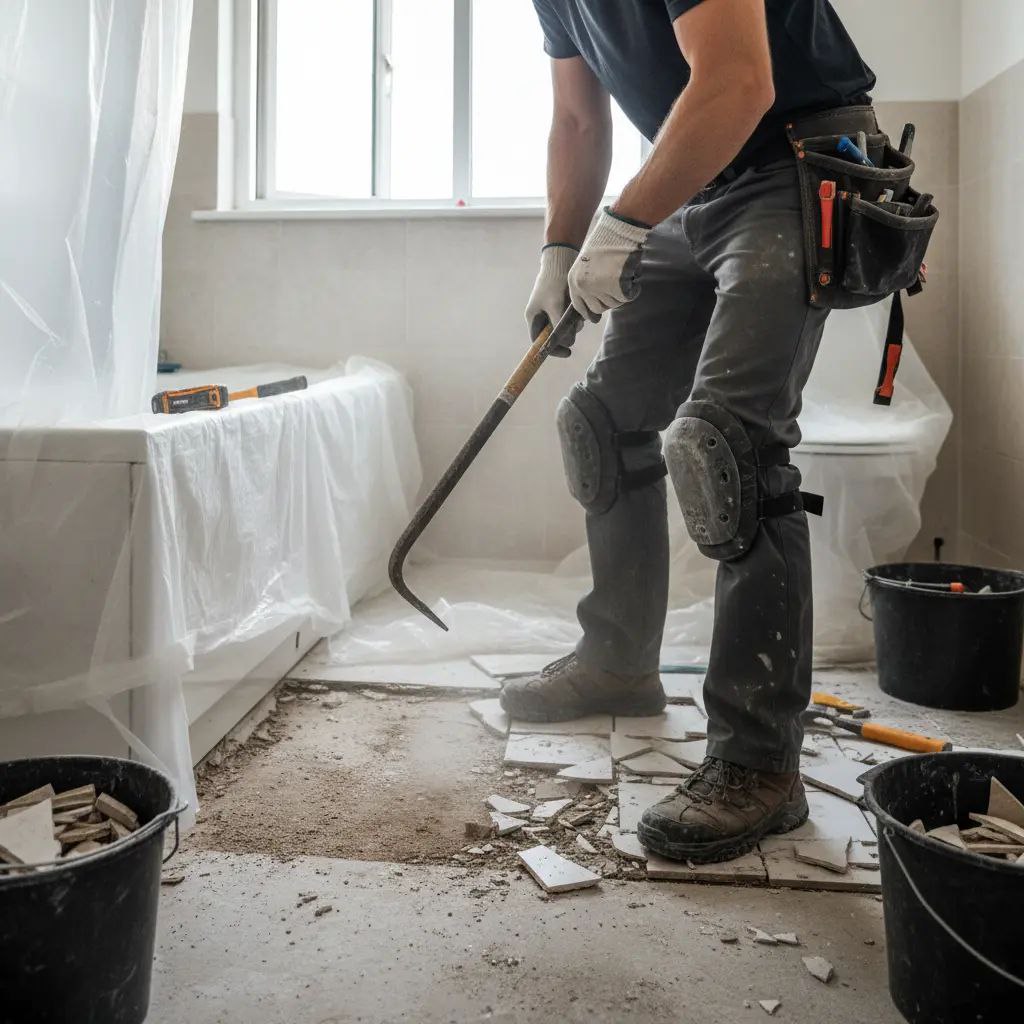
Removing Existing Tile
Remove the existing tile using a hammer and chisel or a power scraper. Start this process from the edge or damaged area. Be careful during removal, use every tool by appointment only. Protect your eyes and hands carefully with glasses and gloves. This approach will help prevent dust and fragments from reaching the mucous membranes and skin.
Cleaning and Inspecting the Subfloor
Proper subfloor cleaning and inspection are a significant step toward creating an aesthetic, safe, and durable tile bathroom floor. Remove all dust, debris, and adhesive materials. Check the surface for damage, rot, or unevenness. The main steps to improve your subfloor are to fix squeaks, grind high areas, fill low areas, and ensure the surface is level.
How to Prepare the Subfloor for Tile Installation
After cleaning and inspection, it’s time for the final subfloor preparation for tile lay. Remember that the quality of subfloor preparation has a great impact on the final result.
Checking for Level and Moisture
For leveling, use a 4- to 6-foot edge to find the uneven spots. Working with concrete, fill the cracks and low spots with a special mortar. Sand down high spots, then apply a self-leveling compound to the wood surface. Before tiling, make sure the floor is perfectly flat. This approach enables the creation of an aesthetic, durable coating.
Installing Cement Backer Board
Another significant process is installing underlayment. Cement backer board is the best choice for damp areas, like bathrooms. It provides a stable and non-flexible base for the next tile laying.
Waterproofing the Bathroom Floor
To protect the coating from subfloor movement and improve waterproofing, use a decoupling membrane. For a concrete base, also use some sealer and wait until it dries completely. Resistance to moisture is a key factor in installing tile on the bathroom floor.
How to Install Ceramic or Porcelain Floor Tile (Step-by-Step)
If you want to know how to install floor tile in a bathroom, this guide will be useful and interesting. Here is step-by-step instruction to help with the right tile installation for an incredible, long-lasting final result.
Step 1: Plan the Layout
Creating the perfect layout is a basis for successful tiling in any space. So, be brave enough to invest a lot of time in this process to achieve the awaited final result.
- Find the center point – for it measures the length and width of your bathroom and mark the intersection.
- Lay your tiles dry – place tiles along both lines with some spaces between them to visualize the layout. Remove it if you are not fully satisfied with its aesthetic.
- Make any adjustments – make some pattern corrections for tile cuts on the walls, so that they will be balanced on both sides. Try creating a new pattern that meets all your preferences.
Step 2: Mix and Apply Thin-Set Mortar
Follow the manufacturer’s instructions to mix the mortar. The consistency needs to be like peanut butter. Let’s learn some tips to use thin-set mortar in the right way:
- For standard tiles, use a 1/4-inch (6 mm) notched trowel; for bigger ones, use a 3/8–inch (10 mm) trowel.
- The mortar should be applied in small areas (about 1 m² / 10 ft²).
- Hold the tool at a 45° angle. It will help ensure full contact between mortar and tile, reduce hollow stores, and increase stickiness.
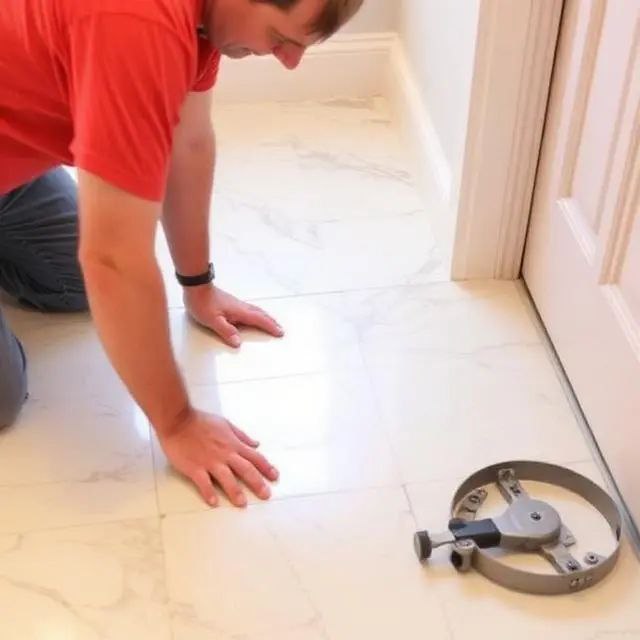
Step 3: Lay the Tile Properly
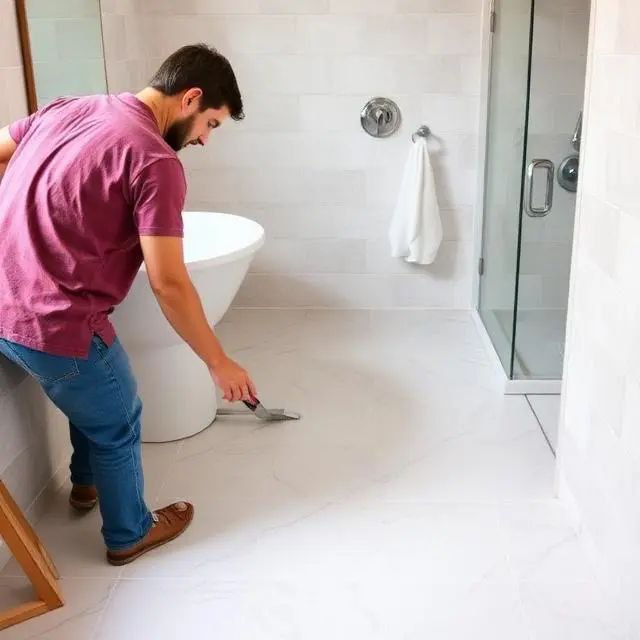
During tile laying, remember to start from the center point outward and maintain symmetry at all times. Press the tile carefully into the mortar and twist it slightly to create a strong bond. Insert spaces between the tiles, usually 2–3 mm (1/16–1/8 inch) for the grout. Tap with the rubber mallet for better adjustment. Try to check the alignment as often as you can using the straightedge.
Step 4: Cutting Tiles Around Obstacles
When it comes to tile cutting, it’s worth saying that you should measure twice. The thing is, you can’t fix the wrong edges after installation. Use a tile cutter. For thicker or stone tile, use a wet saw. Mark all plumbing holes with a pencil and then use a diamond hole saw or nippers.
Step 5: Let the Mortar Cure
After you place all the tiles, let the mortar cure. This may take 24 hours or more. During this time, don’t walk on the surface. Proper curing is important for a strong bond and to avoid tile shifting.
How to Grout and Finish the Bathroom Tile Floor
First of all, mix the grout according to the instructions. Spread the material diagonally with the help of the float across the ceramic or porcelain tiles, then press it. Excess grout can be removed using a float, too. Wipe the surface for 15 – 30 minutes with a damp cloth or sponge.
The final step to finish your bathroom tile floor is cleaning and sealing. When you notice the grout haze, wipe the tiles with a clean, damp cloth or a microfiber towel. Most homeowners also use special grout cleaner for better results. Another great idea is to use a grout haze remover to make tiles look more aesthetic.
Regarding sealing, it’s worth noting that it’s critical only for natural stone tiles. Vinyl, ceramic, or linoleum tiles usually don’t need sealer application.
Common Mistakes to Avoid When Tiling a Bathroom Floor
If you are planning to lay tiles in your bathroom, it is better to avoid common mistakes. It can negatively impact the final result. So, the most common fails are:
- neglecting proper surface preparation;
- using the trowel of the wrong size;
- don’t take care of moisture resistance;
- walking on tiles which are not completely dry;
- use no seal on porous tiles.
The main advice for making a durable bathroom floor is to take each step gradually and not to hurry.
How Much Does It Cost to Tile a Bathroom Floor?
The price for laying bathroom tiles may vary depending on several factors. To make the right calculation, some important factors need to be taken into account:
- tile type (ceramic, porcelain, Logan tiles, or some other type);
- size of bathroom area;
- difficulty of the project;
- number of materials that need to be used;
- tile size;
- etc.
If you want to understand the cost of bathroom tiling, try calculating all the future costs. Another option is to connect with tile masters, discuss your personal project, and get at least an approximate cost estimate.
Should You DIY or Hire a Professional?
When discussing the tile installation in the bathroom, it’s important to understand that this process requires a range of skills and knowledge. Of course, you can do it yourself, but first make sure you can do every step correctly. The thing is that tiling doesn’t forgive mistakes. Also, doing it on your own will most likely take longer than hiring a master. So, think twice before starting a tile bathroom floor, and carefully learn how to remove a tile and lay a tile floor in a bathroom.
The quickest and most reliable option is to hire an expert. Just connect with professional tile installers and get the adorable result and the incredible bathroom interior.
Last Updated on March 24, 2026